


Engraving Tips for Natural Marble Products
Pick Your Method
Thanks to various technological advancements, marble can be personalized with logos, names or messages to create elegant corporate gifts, promotional tools and high-end awards, all at a very competitive price. Most marble can be personalized using either laser engraving, sand etching or rotary/computerized engraving methods. However, each type of marble will behave differently depending on the method and equipment used:
• Stone/Marble is a natural material, hence it varies in terms of color, veining, and density
• Certain marbles are more porous than others
• Certain Stone/Marble are harder than others. Certain veins may be harder than the rest of the engraving surface in one marble product. This is especially true for marble that has lots of veins. This will require adjusting the pressure and the duration of blasting. If the veins are harder, it may require a little more time than the rest of the engraving surface
• When color filing, specially using Rub-n-Buff, the unengraved area of the product should be covered/masked so that the color will not go onto the unengraved area. If the color goes onto the unengraved area and some of the area is porous, the color may not come off upon cleaning. This is specially true for rub-n-buff color filling.
• Do realize that depth makes the difference as to what the final product will look like once it is color filled.
• You may not be able to PMS color match on Stone/Marble products.
• Painted color on engraved area may look slightly different than on some other materials.
• If possible, use metallic based paint. Metallic based paint provides a good shine to a finished product and shows the engraved area very well. The metallic paint also lasts longer than any other paints.
• Run-n-Buff can be used but does not work as well as paint.
• Try to go deep in Stone/Marble products if it is going to be color filled as the color needs to have a space in the stone, otherwise, it will come off with the mask when it is removed.
Sand Etching:
Almost all marble can be sand etched because the sand is able to cut the marble to any desired depth. What is sand etched onto the marble, however, is limited. Images with very detailed, fine lines will be difficult to etch onto the surface. Such images can be produced more effectively with a laser engraver.
Laser Engraving:
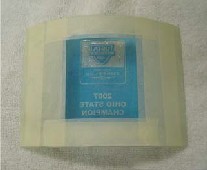
Again, all marble can be laser engraved but each type of marble behaves differently. For example, all light-colored marble turns white or cream in the engraved area, making it necessary to color fill most items unless the engraving is deep enough to provide sufficient contrast. Black Zebra generally requires color filling after laser engraving as it turns a brownish color in the engraved area and some of the white veins will develop a burned effect. Jet Black marble, on the other hand, turns a frosty white in the engraved area, providing an attractive contrast against the black marble without any color filling. Most engravers leave laser-engraved Jet Black marble with its natural look and take advantage of this contrast for engraving photos, creating the look of a classic black and white picture.
Rotary or Computerized Engraving:
As with laser engraving, the color produced in the engraved area will vary depending on the marble used. Only Jet Black marble provides an effective natural result because of its frosty white engraved area. In addition, rotary or computerized engraving machines often present limitations in terms of table heights and machine wear and tear. Because marble has a harder surface than most of the other materials used in the engraving industry, it's important to have a mechanism that will cool down the burnishing tip. If the tip gets too hot, it may become dull fairly quickly and become damaged, as well as chip the marble. Make sure to check with your manufacturer about the specific requirements for your machine when engraving marble.
Color Enhancements
Since most marble won't naturally provide enough contrast in the engraved area, you'll need to color fill your marble products. In order to color fill laser-engraved marble, it's important to engrave deep into the marble, which may require more than one pass depending on the speed and power of the laser machine.
There are two common ways to color fill marble: spray paint and Rub 'n Buff. For those using a rotary engraving machine, your color-filling options have decreased to Rub 'n Buff, because spray painting requires a mask, which cannot be used with rotary machines.
Spray Painting:
You can use this method to color laser-engraved or sand-etched pieces. When laser engraving, create a mask by engraving through your mask material, leaving the open engraved area ready for color filling. When sand etching, create your mask via the photo-resist process or other stencil creation method. Be sure to prep the marble piece by covering all exposed areas not already covered by your mask with additional masking tape. After engraving or sand etching, clean the piece thoroughly by blowing or vacuuming it to remove any debris that remains in the grooves. With the mask on, spray the paint over the exposed engraved area and let it dry. Remove the mask.. Spray glass cleaner on the marble so the blade can glide over it without leaving any scratches on the surface. Now clean any excess paint by scraping the piece with a very sharp razor blade. Once the marble is engraved and color- filled, the spray-painted color lasts for a long time with little or no fading. Any metallic-based or automobile spray paint found at your local hardware or discount chain store can be used. Gold is by far the most-used color, but any color will work depending on your customers' preferences. For example, white or silver also looks nice against black marble.
Rub 'n Buff:
If you are using a laser machine and plan to use Rub 'n Buff, you don't need to mask or prep the marble before color filling. After engraving the piece, clean it thoroughly. Then, wearing rubber gloves, use your finger to rub the color into the engraved text or image. Be sure to fill in every crevice. Let the piece dry for a minute or so, then buff the surface with a soft cotton cloth. The color will rub off the non-engraved surface leaving color only in the engraved area. Rub 'n Buff, which is a wax-like product similar to car wax, can be found at any arts and crafts store in several colors. Unlike spray paint, the color may fade over time.
These are just a few tips and techniques to keep in mind when working with marble. Whether engraved or sand etched, color filled or left natural, marble products are an elegant addition to any showroom. And the combination of a high-perceived value with a very competitive price makes this natural beauty an even more attractive option for you and your customers.
SAND ETCHING EQUIPMENT AND SUPPLIES
CREATING AND PRINTING ARTWORK
Graphics Software (CorelDRAW, Adobe Photoshop, Quark, Microsoft Publisher…).
Laser or Ink Jet Printer (minimum 600 dpi).
Laser or Ink Jet Film or vellum paper.
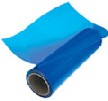
MASK
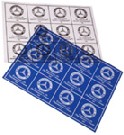
Self Adhesive or adhesive photo resist film
• 2-10 mil thickness (Thin film + light etch = more detail).
• 8.5 x 11 sheets up to 17” wide x 100’ rolls.
• Some photo resist films require adhesive (sold in quarts).
• Custom masks can be purchased.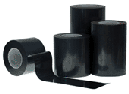
Laser Mask
• PhotoBrasive – Laser Tape 4 Mil.
• Johnson Plastics – Laser Tape 4 Mil.
• Rayzist – LazerMask – 3 & 5 Mil.
• Innotec of Wisconsin – Paint Etch Mask (great for marble).
• Do not use PVC based masks, they will damage your laser.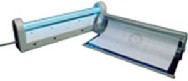
EXPOSURE UNIT
Letralite Exposure System
• Compact.
• Economical.
• Timer.
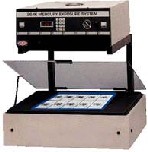
26-1KS Exposure System
• Great for high volume.
• Powerful 1000 watt metal halide lamp.
• Vacuum frame for perfect hold.
• Exact exposure repeatability.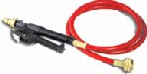
IMAGE DEVELOPMENT
TriggerJet® Spray Nozzle
• Economical.
• Adjustable spray nozzle.
• Easily attaches to any garden hose/faucet.
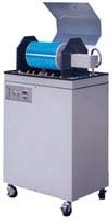
Automatic Wash Out System
• Great for high volume.
• Timer and cycle functions allow for precision washouts.
• Expensive (prices starting at $6,995).
• Consider when washing more than (25) 14” x 10” sheets per day.
DRYING
Air dry (no equipment needed)
• Up to 1.5 hour wait time.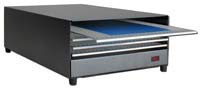
Film Dryer
• Usually 10 minutes.
• Can hold up to 4 sheets at one time.
• Economical.
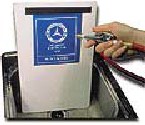
BLASTING
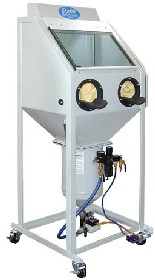
Cabinet
• Sit down operation.
• Abrasive reclaimer.
• Dust collector.
• Lighting.
Pressure pot
• All in one unit.
• Separate unit.
Air Compressor – minimum 3 ½ horsepower, recommend 5hp.
Abrasives
• Aluminum Oxide (150 - 240 grit) Economical
• Silicone Carbide (150 – 220 grit) Superior
• 180 grit is a great multi-purpose abrasive.
SAND ETCHING PROCESS
CREATING ARTWORK
Create positive black and white artwork. (Everything that is printed black will be etched away.)
Minimum 600 dpi printing for deep black areas and crisp lines.
Print on vellum, LaserFilm, or LaserJet Film (no transparencies).
EXPOSING PHOTO RESIST FILM
Always place artwork in between the light source and the film.
Depending on reverse etching from the back or etching on the front will determine which side of the film touches the artwork.
Letralite = 30-90 seconds depending on thickness of film.
26-1KS = 10 units of light (about 8-10 seconds).
Use dark light.
Keep film in dry dark place.
Immediately begin washout process.
WASHOUT
Using TriggerJet® Spray Nozzle
• Hold film onto a flat vertical surface (magnetic tape works great).
• Use warm water (around 100 degrees).
• Spray film using a uniform back-n-forth motion across the film.
• After about 30-45 seconds the image will appear.
• Keep spraying until all of the artwork has been washed out
(around 60-90 seconds).
Automatic wash out system
• Place film onto drum using magnetic tape.
• Follow manufacturers recommendation for cycle time.
DRYING THE MASK
Air dry until mask is completely dry (20-90 minutes depending on humidity).
Film dryer
• Place film shiny side down and tacky side up.
• Approximately 10 minutes.
APPLYING THE MASK
Self adhesive mask.
• Clean surface of dust or chemicals using alcohol.
• Lightly center mask on substrate (adhesive side down). Some masks can be repositioned.
• Apply mask with squeegee – try to avoid air bubbles. (Figure 1)
• Burnish mask to remove any small remaining air bubbles.
• Remove clear carrier.
• Try pushing down on any small remaining air bubbles or use fine wire wheel brush. (Figure 2)
Adhesive mask.
• Clean surface of dust or chemicals using alcohol.
• Using a foam brush, apply thin
layer of adhesive onto etching area of substrate. Try to avoid any air bubbles. (Figure 3)
• Apply coverage to an area larger than your mask.
• Do not shake adhesive bottle (this will cause more air bubbles in the adhesive).
• Apply mask using squeegee. (be very careful, once the mask is applied it can not be repositioned.)
• Once the mask is down and the air bubbles have been squeezed out, remove the clear carrier.
• Try pushing down on any small remaining air bubbles or use fine wire wheel brush. (Figure 2)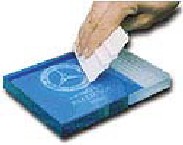
Figure 1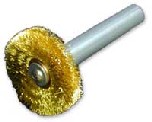
Figure 2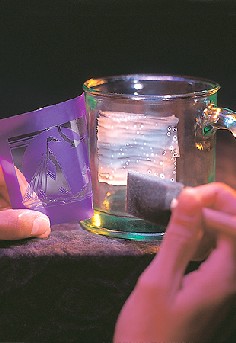
Figure 3
Lasering the mask.
• Clean surface of dust or chemicals using alcohol.
• Apply laser mask using squeegee – try to avoid air bubbles.
• Burnish mask to remove any small remaining air bubbles.
• Remove clear carrier if applicable. (figure 1)
• Prep back side of substrate with masking tape to avoid scratching in laser machine.
• Once the substrate is in the laser machine, run a test at low power and speed to make sure image is centered
correctly on the piece and adjust if necessary.
• After the image is positioned correctly, burn the positive image on the mask. (figure 2)
• Powers and speeds will vary with different types of laser machines and thicknesses of films.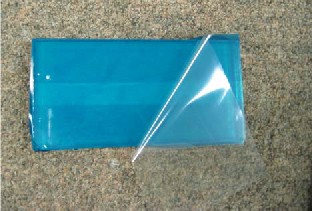
Figure 1
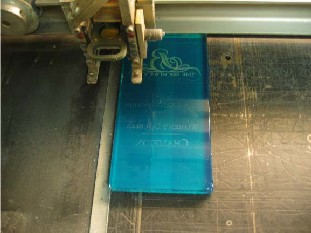
Figure 2
PREPPING GLASS, MARBLE OR CRYSTAL FOR ETCHING.
Tape off any area you do not want to be etched.
Use masking tape (experiment withdifferent brands to find the one that has good adhesion, but removes easily).
Use thin poly bags to mask off larger areas.
Protect, Protect, Protect!
Handle the substrate very carefully while transporting to different areas.
Make sure to mask everything possible, especially when color filling.
ETCHING
Blast using pressure around 25 psi..
Hold nozzle perpendicular to the substrate and about 12” away.
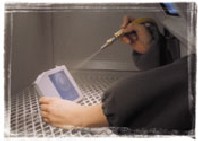
Start by applying a light etch over the entire mask, this will insure good adhesion of the mask to the substrate.
Once the mask has good adhesion, proceed to around 6” away and blast the entire image.
Experiment with etching times to achieve desired etching depth (some substrates are harder than others and may require additional etching time).
When finished etching, blow off any excess abrasive that might be on the substrate.
COLOR FILLING
DO NOT REMOVE THE MASK AFTER ETCHING.
Clean and remove dust off the mask in the engraved areas (very important).
Depending on substrate and colors – apply paint to etched areas.
Krylon® & Rustoleum® fast drying metallic spray paints work great.
Primers may be necessary when using non-metallic paints.
Experiment with different types of paint to achieve one of a kind awards.
Rub-n-Buff® can also be used but does not work as well as paint.
Multiple colors can be achieved by masking off different areas and painting in multiple stages. You can also paint the individual areas by hand.
Let dry completely before removing mask.
Color filling glass is not recommended for dishwashers.
CLEANING FINAL PRODUCT
GLASS AND CRYSTAL
• If glass has been color filled – proceed to marble cleaning instructions.
• Blow off glass with compressed air to remove any loose particles of abrasive.
• For best results soak glass in hot water until mask begins to lose it’s adhesion.
• Carefully remove the remaining mask and film. Be careful not to scratch the glass with any loose particles of abrasive.
• Air dry or continue to dry with clean towel.
• Final cleaning can be done with window cleaner or alcohol.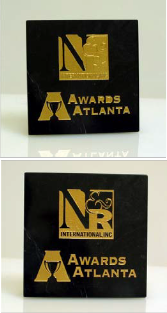
MARBLE
• Blow off glass with compressed air to remove any loose particles of abrasive.
• For best results do not soak marble in water.
• Carefully remove all tape from marble.
• Once the tape has been removed – spray film with light coating of window cleaner.
• Now using a new straight razor blade, scrape off the remaining film from marble. The window cleaner acts as a lubricant and avoids any loose particles of sand from scratching the marble.
• Always use a new razor blade on a new piece of marble (the small cost of a razor blade out ways damaging the marble).
• Any overspray of paint can be removed with Goo Gone®
or any industrial citrus cleaner (be careful not to use
Goo Gone® on any color filled areas – it will remove the color filling).
• Final cleaning can be done with window cleaner.
SAFETY
BLASTING
• Have good ventilation in work area of sand etching equipment.
• Use dust mask to avoid breathing in the fine particles of abrasive.
PAINTING
• Use in a well ventilated room designed for painting.
• Paint fumes are very toxic and should not be taken lightly.
• Read and follow manufacturers directions and safety precautions.
• Use the appropriate mask or paint respirator.
The authors of this handout have used their best efforts in preparing this hand out. The authors have used their recommendations of products and equipment however additional products and equipment may exist and should be considered when making buying decisions. The information and diagrams contained in this handout are strictly for educational purposes.
Follow Us